EMA Indicator: How to Use Exponential Moving Averages for Trading Success
- What Is the EMA Indicator?
- EMA Formula and Core Parameters
- How to Configure the EMA Indicator in MT5
- Using EMA to Read Market Direction
- EMA as Dynamic Support and Resistance
- EMA Crossover and Momentum Strategies
- Combining EMA with Other Indicators
- Strengths, Limitations and Risk Management
Exponential Moving Average (EMA) is one of the most widely used technical indicators for identifying trends, smoothing price data and timing entries and exits in financial markets. It reacts more quickly to recent price changes than a Simple Moving Average (SMA), which makes it especially attractive for active traders who need timely, yet filtered signals. When used correctly, the EMA indicator can become a central element of a systematic trading approach rather than just a visual aid on the chart.
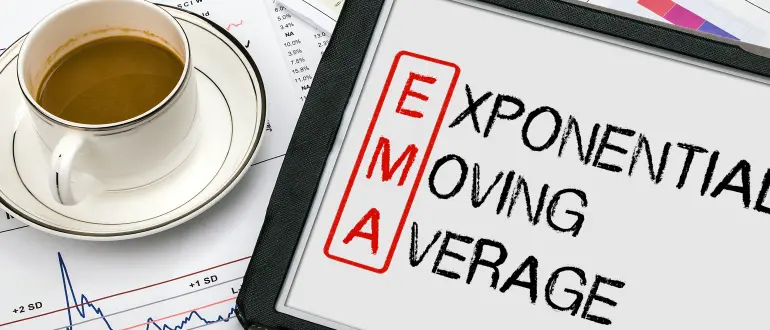
What Is the EMA Indicator?
The EMA indicator is a type of moving average that assigns greater weight to the most recent prices while still incorporating older data in a decreasing fashion. This weighting scheme allows the line to follow price more closely than an SMA of the same period, giving earlier signals when the market accelerates or slows down. On a chart, the EMA appears as a smooth curve; its slope and position relative to price help traders quickly understand whether the market environment is bullish, bearish or neutral.
When price spends most of the time above a rising EMA, buyers are in control and the path of least resistance is to the upside. When price trades below a falling EMA, sellers dominate and short setups tend to have better odds. This simple visual rule makes the EMA indicator a natural first filter for many trading systems.
EMA Formula and Core Parameters
The EMA is computed using a smoothing multiplier that emphasizes recent price data. The standard formula for the multiplier is K=2/(N<+1), where N is the number of periods. The updated EMA value is then obtained by combining the current price with the previous EMA:
EMAt=Pricet×K+EMAt−1×(1−K)
This recursive structure ensures that every new value depends on the previous average, gradually fading the impact of older prices instead of dropping them abruptly. Shorter periods (for example 9 or 12) produce higher multipliers and more responsive lines, while longer periods (such as 50 or 200) create smoother, slower-moving curves.
Traders often work with several EMAs at once: a fast line to capture short-term momentum, an intermediate one to define the swing trend, and a slow one to represent the broader context. A common combination is 20, 50 and 200 periods, which offers a good balance between sensitivity and stability across many markets.
How to Configure the EMA Indicator in MT5
In MetaTrader 5, the EMA indicator is available through the standard Moving Average tool. To set it up, you open the moving average dialog, choose the “Exponential” method, select the desired period and apply it to the closing price. The platform lets you save these settings as part of a chart template, so you can quickly reuse your preferred EMA configuration for different symbols and timeframes.
Colour and style customization is more important than it might seem. Assigning distinct colours and thicknesses to different EMAs (for example a thin line for a fast 20-period EMA and a thicker line for a slow 200-period EMA) makes it easier to interpret the chart at a glance. Many traders also adjust the EMA periods depending on the timeframe: shorter periods for intraday charts and longer ones for daily or weekly analysis.

Using EMA to Read Market Direction
The primary role of the EMA indicator is to help define trend direction and filter trades. A simple rule is to treat the market as bullish when price is above a rising EMA and bearish when it is below a falling one. This rule can be applied with different periods: a 50-period EMA might define the swing trend on the 4-hour chart, while a 200-period EMA can represent the dominant direction on the daily chart.
Multi-timeframe analysis enhances this idea. A trader might first check the daily EMA to understand the higher-timeframe bias and then drop to the 1-hour chart to look for setups only in that direction. If the daily EMA points up and price trades above it, the trader focuses on buying dips on the lower timeframe rather than shorting rallies. This alignment between timeframes reduces the temptation to trade every small countertrend move.
The slope of the EMA matters as well. A sharply rising line indicates strong momentum, while a flat line suggests consolidation and low directional conviction. In flat conditions, many EMA-based systems perform poorly because the indicator keeps generating signals in both directions with little follow-through, so recognising these periods is essential for risk control.
EMA as Dynamic Support and Resistance
In trending markets, EMAs often act as dynamic support or resistance zones where price tends to pause or reverse temporarily. During an uptrend, pullbacks frequently stall near popular averages such as the 20- or 50-period EMA before the trend resumes. Traders use these pullbacks to enter with the trend at a better price instead of chasing breakouts.
A typical tactic is to wait for price to approach a rising EMA from above and then look for confirmation in the form of a bullish candlestick pattern or a momentum shift. The average itself becomes part of the trade plan: stops are usually placed just beyond it, on the other side of the line, so the position is exited if the market clearly breaks the dynamic support. The same logic works in reverse for downtrends, where rallies into a falling EMA can provide short entries.
When several EMAs cluster in a narrow price zone, that area often becomes a particularly strong decision point. A bounce from a zone where the 20-, 50- and 100-period EMAs converge may signal a powerful continuation move, while a decisive break through that cluster can indicate a deeper correction or an emerging reversal.
EMA Crossover and Momentum Strategies
EMA crossovers are a classic way to generate trading signals. In their simplest form, crossovers compare a fast EMA with a slower one: a bullish signal appears when the fast line crosses above the slow line, and a bearish signal when it crosses below. Well-known examples include combinations like 9/21 or 12/26 periods, which are popular among momentum traders.
These systems tend to perform best in markets that exhibit clear directional trends, where the crossover marks the beginning of a sustained move. In sideways conditions, however, price can oscillate around the EMAs, causing multiple crossovers with little net progress. To reduce whipsaws, traders often add filters such as requiring the higher-timeframe EMA to agree with the direction of the signal, or waiting for a minimum angle of the slow EMA before acting.
More advanced approaches use three EMAs (fast, medium and slow) and only take trades when all three lines are aligned in the same order, which indicates consistent momentum across several horizons. Entries then occur on pullbacks toward the medium EMA, while exits are triggered when the fast line crosses back through the medium line or loses its trend-consistent slope.
Combining EMA with Other Indicators
The EMA indicator becomes more powerful when combined with complementary tools rather than used in isolation. One common pairing is EMA with the Relative Strength Index (RSI). In such a setup, the EMA defines the trend direction, and RSI helps avoid entries when the market is extremely overbought or oversold. For example, long trades might only be taken when price is above a rising EMA and RSI has cooled down from overbought levels without dropping into strong bearish territory.
Another frequent combination is EMA with support and resistance levels. When a horizontal level and a key EMA line overlap, the resulting confluence zone often attracts more attention from market participants and can generate stronger reactions. Price action patterns—such as pin bars, engulfing candles or inside bars—forming around such zones give additional confirmation for entries or exits.
Volume analysis can also complement EMA-based decisions, especially on markets where reliable volume data exists. A breakout above an EMA cluster accompanied by rising volume suggests institutional participation and increases the chance of trend continuation, while a similar breakout on weak volume warrants more caution.
Strengths, Limitations and Risk Management
The EMA indicator offers several strengths: it is easy to understand, adaptable to different markets and timeframes, and visually intuitive for quickly assessing trend direction and pullback areas. Its responsiveness gives earlier signals than simple moving averages, which can be valuable for active traders seeking to capture a larger portion of each move.
At the same time, EMA is a lagging indicator based on past prices and does not predict future moves on its own. In choppy or range-bound markets it can generate many false signals, particularly when used in crossover strategies without additional filters. For this reason, it should always be integrated into a broader framework that includes risk management and, ideally, other confirming tools.
From a risk-management perspective, EMAs provide natural reference points for stop-loss placement and trade invalidation. Traders can define in advance that a long trade remains valid only while price stays above a chosen EMA, or that a short trade is closed once price closes back above the line. Coupled with conservative position sizing and predefined profit-taking rules, this structure turns the EMA indicator from a simple visual guide into a disciplined component of a complete trading plan.